Saturday, June 23, 2012

review: Sally Hansen Nail Polish Strips


review: Sally Hansen Salon Effects Real Nail Polish Strips in "All-A-Flutter"

I like the idea of these, but I've always been skeptical that they would fit my wide nails, and at $8/box I wasn't willing to give it a try.  But today I saw this Spring pattern on clearance and decided to risk the $2.61 :)

they're very easy to use with the included instructions, and because my nails are quite stubby at the moment I cut each in half so I did all 10 of my nails with only half the box.  It comes with 8 sizes (2 each), of which 5 should match your nail bed size.  The largest wasn't quite wide enough for my thumbnails, but it looks fine.

The hardest parts were separating the layers and applying it straight.  some nails I didn't get it centered until the 4th try, but as long as I didn't push it down until it was right, it was surprisingly repositionable.  And unlike most nail polish, my right hand looked pretty much as good as my left, though I accidently applied two nail sizes reversed.

If you want to cheat and get two nails out of each strip, cut it with scissors after verifying that it will be long enough for each nail.  trim the tab end with the scissors, because the tab does not come off cleanly.  peel the layers and hold the strip on the straight cut side and proceed as directed.


I just did them so I can't verify to how long they'll stay put.  I'll try to remember and report that later :)

I will want to experiment with applying these over polish, on part of the nail only, etc.  maybe I'll be nice and put one of the tiny ones I have left over onto my daughter's nails (most polish only lasts 30 minutes on her :)


UPDATE:

 4 days later they were virtually perfect, just a slight wearing off at the tips.  And I was not babying it either - that's after dishes, laundry, cooking, and endless handwashing.  But I was getting restless with the pale butterflies, so cleaned one hand off last night (and even with acetone polish remover, was quite reluctant to come off!)
Most of my nail polish would be horribly chipped by the 3rd day.This makes me think that a more generic pattern/color of polish strips might actually be worth it if it lasts the 10 days the box claims.

Thursday, June 14, 2012

how to paint your nails like they haven't been painted, in 4 easy steps

This is how I do a french manicure.  Nothing official about it (never been taught how) but this method works for me.

start with clean, polish free nails (duh)
1) apply white polish to tips only.  sweep across with small tipped brush (like on nail art bottle or mini bottle).  when I'm doing my right hand I sometimes just roll the finger nail under the brush rather than pulling the brush (did that make sense? :)  don't worry about polish that ends up off the nail.  If it comes out really crooked, you can just remove that nail's polish and reapply. (an advantage to doing this step first)
2) apply thin coat of nude polish (light milky pink or peach color).  this evens out the nail's color and protects the nail. again, don't worry about stray polish
3) apply clear polish as top coat.  sometimes I'll use a sparkle polish for the top layer, but I usually regret doing anything else :)  I like seche vite because it dries fast, seems to harden the polish underneath, and is super shiny.  but it literally stinks!

Sunday, June 10, 2012

Summer nails: watermelon!

whimsical nails done to celebrate the end of the school year and the start of Summer: watermelons!

I primed the nails with clear, then painted the whole nail Maybelline Express Finish in "Racy Red", two coats.  then I drew white stripes on the nail bed (wide enough to paint the green stripe over it, because the green looked brown directly over the red).  Then I painted dark green (SH "Emerald City") over the white and black dots over the red (Sinful Color's Nail Art in "Time Off".  Once everything had dried thoroughly I coated it all with Seche Vite, which gave it a lovely juicy shine :)

the right hand was just Racy Red, I painted my big toes as watermelons and the rest of my toes Racy Red as well.  I considered painting the edge white and green instead of the nailbed side,but figured this way would look better as it wore off.

Thursday, March 22, 2012

Spring/Easter nails

inspired by the egg hunt we're doing with the moms club tomorrow :)


All polish, done in various shades of Sally Hansen polish and Sinful Colors nail art polish. sealed with seche vite .  sorry the pic quality is so crappy.

Monday, March 19, 2012

More Irish nail designs


these were just going to be green sparkly (Nicole by OPI's Brilliant Idea over Maybelline Express Finish's Go Go Green) but a layer of Essie's Shine of the Times added specks of orange gold from certain angles.  Fun combo of colors/effects

For the thumb: I accidentally rubbed off a section of polish, so I painted it black and added detail with same Essie over black and some bits of shine from SH's In The Spotlight :)

Wednesday, March 14, 2012

St. Patrick's Day nail art


Here's my St. Patrick's Day themed nails.  Don't love the finger designs but they came out nice enough.  The one on the right is supposed to be a harp, hence the music notes because it didn't come out very obvious :).  The thumb is pretty cool though the picture above doesn't do it justice.

Basic manicure plus black sharpie marker and various Sinful Nail Art colors (orange, green, gold, black) plus some OPI glitter polish for accents.  sealed with Seche Vite topcoat

Monday, March 5, 2012

cupcakes!


took a few tries to get the "cake" portion color right, probably should have practiced it on paper first :)  cherry is sparkly red applied with end of a bobby pin.  sprinkles are dotted with the pointed side of an orange stick, and black lines are drawn with black Milani Nail Art polish

this design exists all over the net, but I thought it would be better the other way up (frosting along edge of nail.)  After doing thumb that way, I decided they all had it right, even if my nails are pretty stubby right now :)

Tuesday, February 28, 2012

Ghosts of Manicures Past!

These are photos of designs that I have done over the past year.  Many are inspired by artists on YouTube and Pinterest, others are originals.  Hope you like-eeeeeeeeeee!
water marble
rainbow crackle
Ladybug
Pink "tufting"

I saw this design online somewhere.
I wish I could remember where but I love it!

Black and gray french

Dots

Fleur di lis

Again, I saw a tutorial and had to do this.

Girlie Charm Bracelet

Flowers

Metallic Feathers

Snowy Pines

 Found on Pinterest, Dandelions

80's Inspired

"The Cheat" from homestarrunner.com

Birch Trees

Dot/heart Dragging

Taping/craft scissor technique 

Pink and Black "flames" on French

CLose up of metallic feathers

Grey and black roses

Jack Skellington

Black, red and white roses

Found this online, snowflakes

Peacock feathers

Vintage roses

Taping technique


COMING SOON...
I will be posting links to my favorite artists.  I feel bad that I cannot remember which design came from where.  I gain inspiration from many places and want credit to be given were it is due.

Nail Care Basics

Great nails begin with the basics.  Just like applying make-up, you have to have good basic care before anything can be put on top.  Otherwise you just look like crappy-poo (and feel like it too).  Here are a few things I do to improve the health of my nails. 


1. Use Non-Acetone Nail Polish Remover
I personally own both kinds however I only use the acetone when I have on glitter polish (it is a pain in the tooshie to get off otherwise). Acetone is very drying to the nails and skin.  If you have to use it, keep it to once a week and use lotion on your hands after you wash the darn stuff off.


2. Push Back Your Cuticles
 Pushing back your cuticles gently with an orange wood stick or cuticle pusher will help prevent the cuticles from overgrowing.  BE SURE you soak your fingertips in warm water or apply cuticle remover (it really doesn't remove them...it softens them) first.  Pushing on dry cuticles could rip or tear them and lets in those nasty germies that lead to infection.  Once you have pushed back the cuticles, use the orange stick to clean up and remove any dead skin left on the nail.


3.Carefully Trim Hangnails
Top: Cuticle Trimmer
Bottom: Nail Trimmer
DO NOT TRIM THE HEALTHY CUTICLES! If you have some hangnail action going on around those clean nails, get to trimming.  Otherwise, leave them the heck alone. Remember the nasty germies from #2???  Ya,  they like to infectify your nails.  Be very stingy with your trimming.  Trim just the skin that is hanging with a CLEAN cuticle trimmer.  Don't use a regular nail trimmer. It is not precise enough and could make it worse.


4. Use Hand Lotion
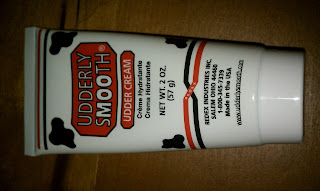
EVERY CHANCE YOU GET!  Choose a lotion that absorbs quickly and is highly moisturizing.  Rub it into your hands and cuticles really well. Dry hands=dry cuticles=old lady hands and hangnails.  Not pretty my friends.  I love using Udder Cream.  It is cheap, unscented, sinks in quick and is found at any drug store. It also comes in a handy travel size that you can chuck in your bag when you are running out the door.


5. File Carefully 
The shape you file your nails into is totally your choice. Square, round, whatever. It does matter how you file and what you use.  If you have natural nails choose a finer grit file.  If you use the heavy duty grit...oh boy, your poor nails are going to be screaming at you.  I use a medium grit file to shape and then finish it with a fine grit to seal the edges.  Sally's Beauty Supply has a great variety of files that can be sanitized as well (I will talk more about cleaning your tools in a bit).  File gently from the outer edge to the center on both sides.  Your fingers are not logs so DO NOT SAW BACK AND FORTH.


6. Base Coat, Base Coat, Base Coat
Dammit people. It takes 5 minutes to throw on a base coat to protect your nails from...well...anything and everything!  Polishes can stain your nails without it and also help to prevent chipping and peeling of the nails. Not much more to say about this one kids, except, get off your butt and get some.  Period (end rant:).  


7.  Choose The Right Polish  
Try to choose polish that has good staying power.  The more you have to change your polish, the harsher it is on your nails.  Essie, OPI and Sally Hansen Extreme Wear are a few brands I swear by.  


8.  Don't Be A Picker  
If your polish starts to chip and you can't re-polish right that second, LEAVE IT ALONE.  If you start to peel and pick you are going to damage your nails.  Remember the base coat you applied?  Well, that helps the polish adhere to your nails better.  So, it is like gluing two pieces of paper together and then tearing them apart (remember doing this when you were 7?)   Some of the nail may peel off with the polish thus damaging the surface of the nail.  So, you can pick your polish but you can't pick your polished nails (ba-dum-bump...ching...I'll be here all week people).


9. Give Your Cuticles A Nightly Massage
 Every night before bed rub a cuticle balm or oil onto your nails.  It will help to keep the skin around your nails healthy.  Healthy cuticles grow healthier nails.  I LOVE Bert's Bees Lemon Butter Cuticle Cream.  It is a very lemony ointment that does wonders on my hands.  I also use it on my feet when they are extra dry. Using a regular cuticle oil or vitamin E oil is great too. 


10. CLEAN YOUR STUFF!!  
Please remember that you must clean your tools from time to time (and by time to time I mean once every other week).  Soak your metal clippers and trimmers in hot soapy water to remove any nail dust and debris (ewwwwww, I know, but you have to do it).  Let them sit for 5-10 minutes.  When you remove them from the water, rinse them off in the sink and dry with a clean towel.  Use rubbing alcohol on a cotton ball to further sanitize and disinfect.  As far as files go...don't share 'em and chuck 'em when they get icky.  It is easier to replace them and it is very inexpensive to do so.  Store everything in a clean container.  


Hopefully some of this was helpful.  Please remember I am not an expert.  This is what I do for my nails and works for me.  Try out lots of products and see what works for you.  Thats how I developed this routine.  For heaven's sake though, if you do anything...  file your nails, push your cuticles back and put a clear base or top coat on to protect those nails.  Trust me...you will thank me for it. 


Deirdre's previous nail art: nature